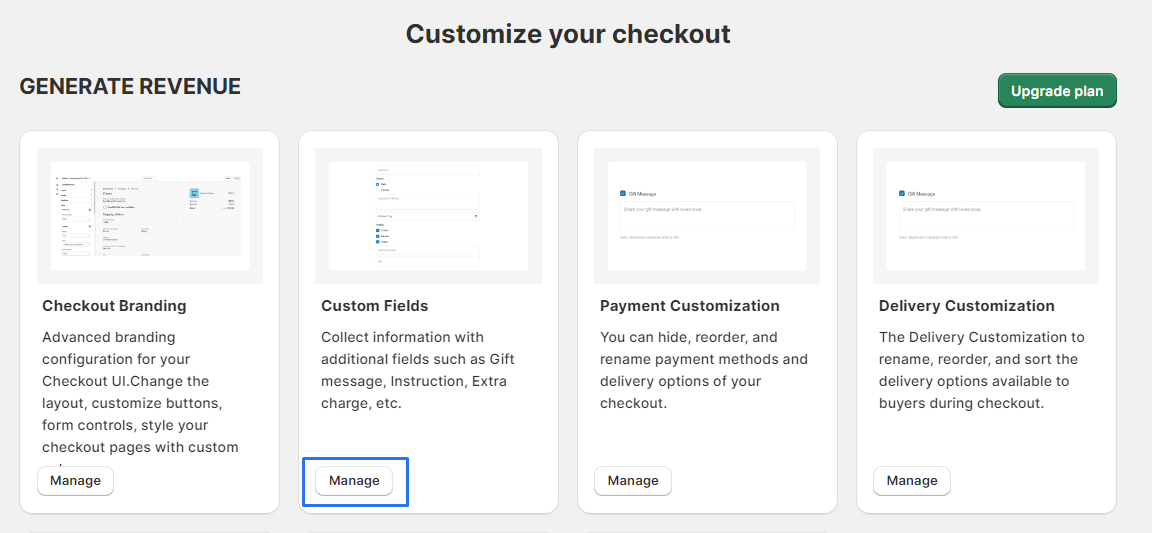
Custom fields block
Collect information with additional fields such as Gift message, Instruction, Extra charge, etc.
1 . Go to shopify Admin Panel
Click on apps => Spring Checkout Customization
2 . Within the app, go to the "Custom Field Block".
Click on "Manage" to open the custom fields widget management area.
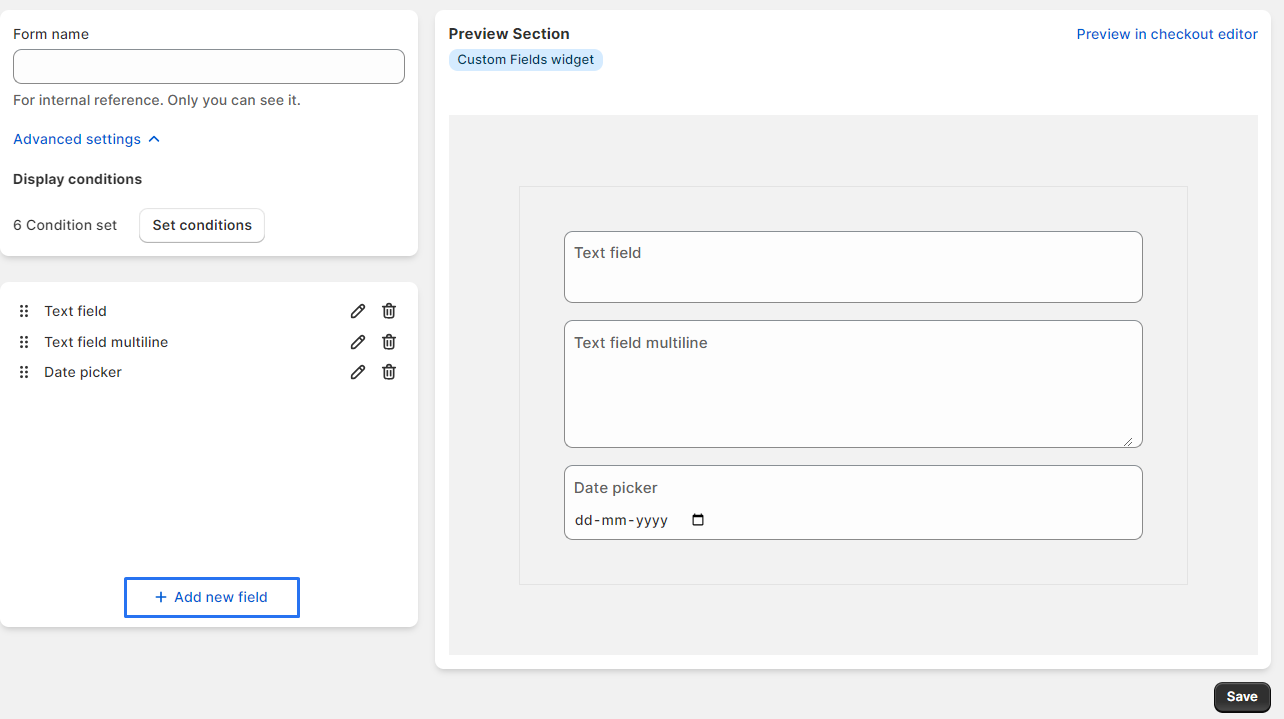
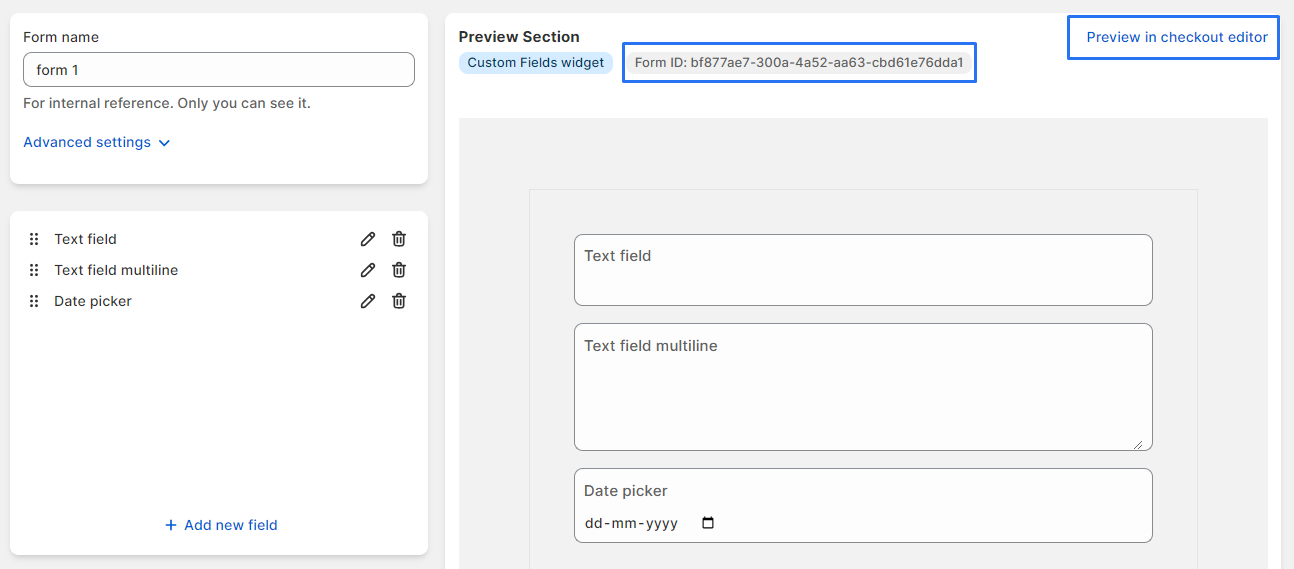
3 . Click on "+ Create Customization" to begin creating a new form.

4 . In the form editor, click on "+ Add New Field".
5 . Configure each field as necessary, adding options like Gift message, Instruction, Extra charge, etc. After adding and setting up your fields, click the "Save" button to save the form.
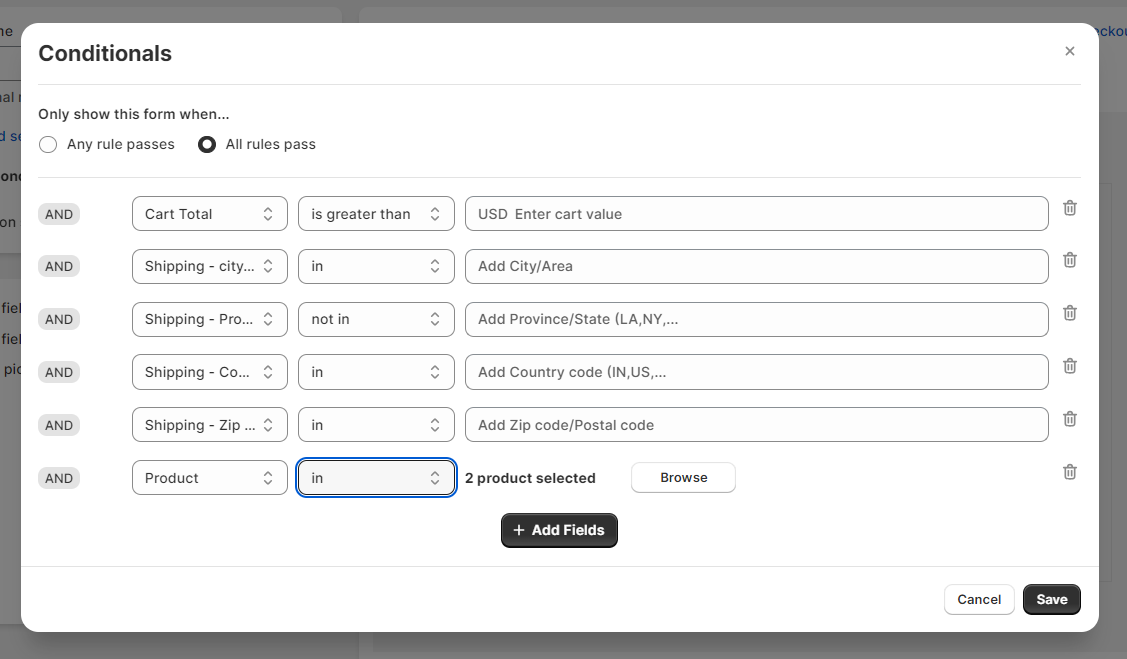
6 . Click on the "Add Condition" button to configure the rules under which each field should be shown.
7 . Use these elements to create a rule for when the field should be displayed.
8 . Once you’ve set the conditions, click the "Save" button to apply them.
9 . Find your form in the list and click the "Edit" button.
After clicking the "Edit" button, This action takes you back to the form builder interface.

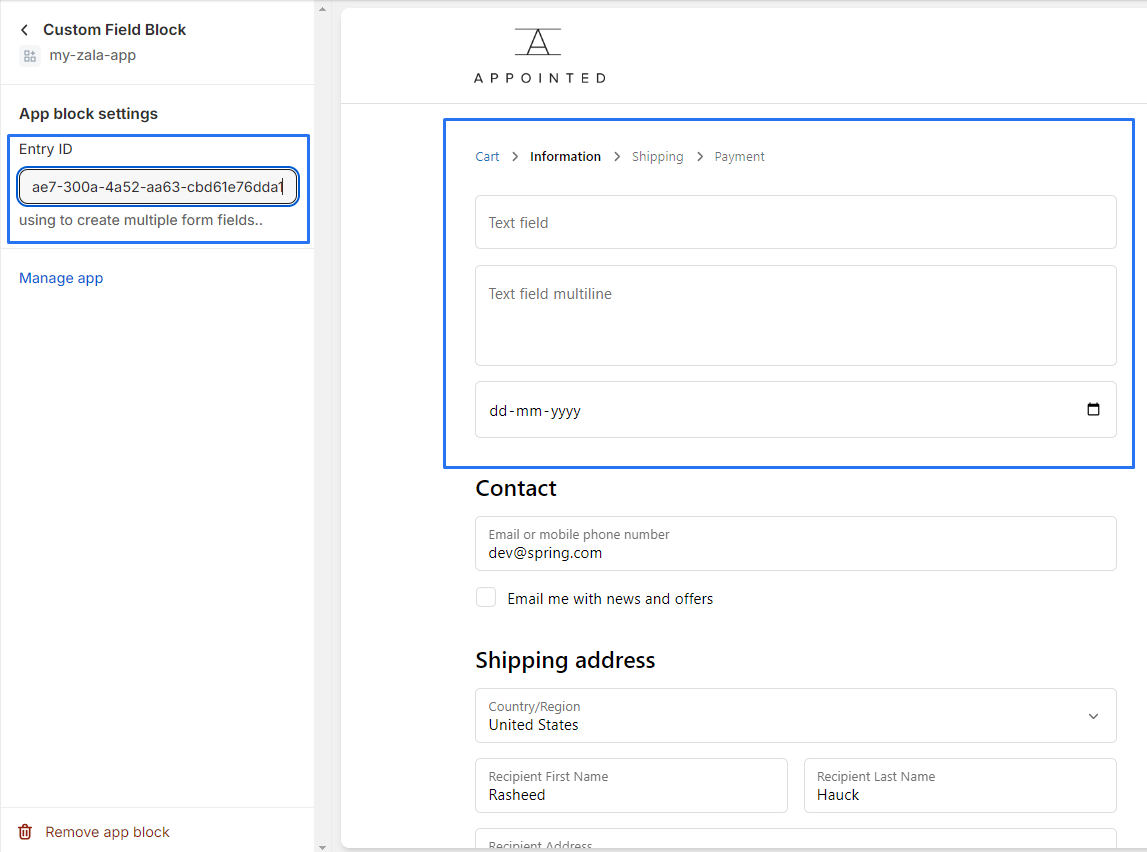
10 . Select the form ID by clicking on it, then press `Ctrl+C` (or `Cmd+C` on a Mac) to copy it.
11 . Click the "Preview" button associated with the form to view it in action.
12 . Click the "Add App Block" button to browse available app blocks.
13 .Scroll and find the "Custom Field" app block.
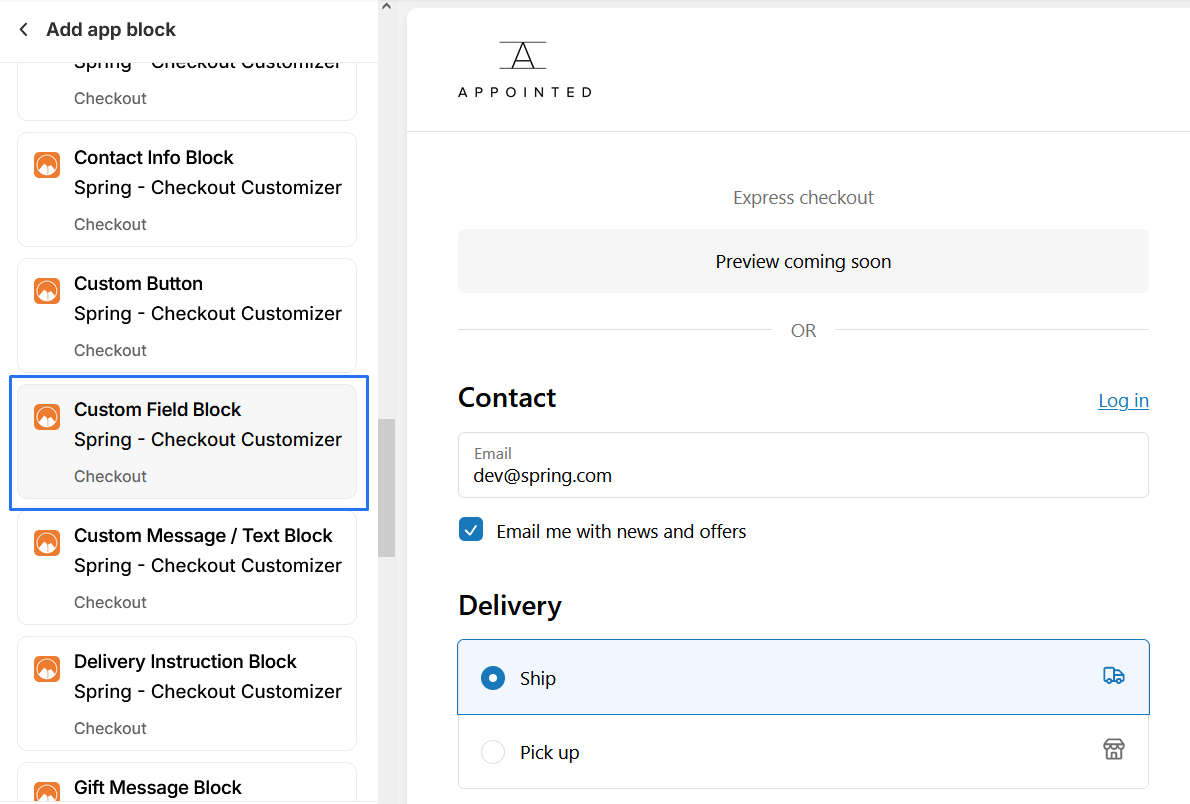
14 . Click on the "Entry ID" field in the app block settings and paste your copied form ID.